Process Behind the Manga Page
I wanted to start off today’s episode of Making Manga by showing the design process for a page in chapter 5 of the grydscaen: scout manga volume 2. This is the final page in chapter 5 and I will outline the process from the original pencils to the final image prior to adding the words.
Designing Page Pencils
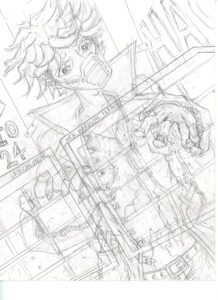
For the original pencil drawing for this page, the character highlighted is the Level 9 hacker ROM at the Hack nightclub using a hardline terminal. In the previous scene in the manga, ROM entered Hack and went to the Hardline terminals and was going to jack in ad attack anotehr hacker.
The previous pages set up the tension between ROM and the hacker AYOR and after this panel the two hackers will get into a fight in the next volume 3. I wanted ROM to be the central element on the page so therefore only one panel was key to the aesthetic and the feeling I wanted to do on the page.
Pencil Details
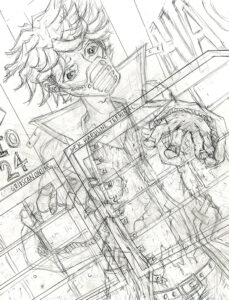
Once the original light pencil lines are done I wanted to look into the details on the page and then after this is the cleanup. Usullay next is the clean inked lines. Here is prior to the cleanup focused on the details like the fingers of the hands, the fingerless gloves and the monitors with the perspective and why ROMs hands are larger in the image as they are closer to the screen.
Shading with Copic Markers
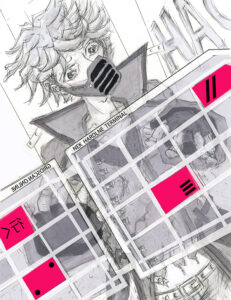
After the pencils is the inking of the lines and I do all my work traditional so the shading of the pages is done with copic markers colours N1 – N6 for neutral greay then using an xacto knife and tone heya to add the traditional tones using screentone sheets. In the copic marker drawing I wated each page to have

Final Shaded Page
In the final shaded page which was scanned into the computer and then some design elements added. This page is also the main completed work. The next step is to ensure all the tiny details with is the final step.
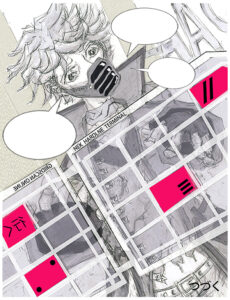
Adding Dialogue Bubbles to Final Shaded Page
Once the shading and toning are done traditionally, it is time to scan the page into the computer and add the word bubbles in Manga Studio. Here you can see the word bubbles added. I usually create the pages without dialogue and then end up writing a script once I have the idea for the page flushed out. Many manga artists write the script prior to the artwork but I find that stifling and it boxes me into the what has to be drawn on the page so I add the dialogue after the page composition is done and create a draft script which I then use to work on the dialogue.
Rounds of Edits with my Manga Editor
Once the initial manuscript draft is completed, it is put into a “printer spread” called a “galley and there is a round of self-edit corrections that I make and if you have Beta Readers who a advance readers you trust who read the unedited manuscript called an “ARC” known as an “Advanced Reader Copy.” The galley is also sent to my Manga Editor to check for continuity of the story, flow and pacing. In the Edit Phase the Editor also checks spelling and grammar, as well as word choice and image issues to ensure there are no continuity and story flow issues.
In this edit you can see some wording changes were requested and some background details as well.
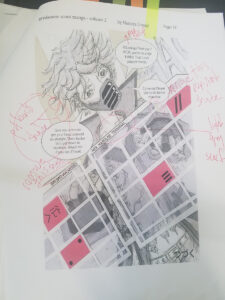
Once all the edits are complete, the changes are made and the final galley is created which is the “printer spread” that will be the print version taken to the printer.
Final Page
And here is the final page of the “grydscaen: scout V2” manga.
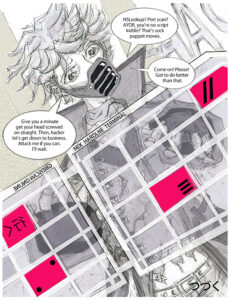
“grydscaen: scout” and “grydscaen: scout remnant” are Copyright 2021 by Natsuya Uesugi.